What Are The Different Types of Asian Noodle Dishes?

asian noodle dishes

Asian noodle dishes play a pivotal role in the culinary landscapes of their respective regions, offering not just nourishment but also a rich tapestry of culture and tradition.

These versatile staples come in numerous shapes, sizes, and textures, each contributing to the unique dining experiences across countries such as China, Japan, Thailand, and Vietnam. From comforting bowls of ramen to the vibrant stir-fries of pad Thai, noodles are often a focal point of meals, symbolizing not just sustenance but also community and celebration.

Their significance extends beyond mere ingredients; they are intertwined with history, showcasing the diverse flavours and cooking methods that reflect the heart of each culture.

Join us as we take a whistle-stop tour around the world of Asian noodle dishes.

Types of Asian Noodles

Unsurprisingly, Asian noodle dishes all begin with noodles. Like pasta, there is no such thing as just a noodle and each type is suited to the dishes they belong to and the local ingredients available.

Wheat Noodles

Wheat noodles are a cornerstone of many Asian cuisines, boasting a variety of textures and flavours that make them incredibly versatile. These noodles are made from wheat flour and water, giving a chewy consistency that absorbs sauces beautifully. Their ability to take on different shapes, from thin and delicate to thick and hearty, allows them to shine in a wide range of preparations, whether in a simple soup or a vibrant stir-fry.

They often carry regional nuances; for example, while both Chinese and Japanese variants use wheat, the methods of preparation and accompanying ingredients can vary significantly, showcasing the rich diversity of Asian culinary traditions.

Egg Noodles

Egg noodles are also made from wheat, but are bound with egg instead of water for a richer flavour and texture. Their ability to soak up sauces while remaining resilient during cooking makes them a favourite in stir-fries and soups alike.

With regional variations, egg noodles adapt seamlessly to local ingredients, contributing to their popularity across many Asian cultures, from the comforting bowls of European-inspired noodle soups in Thailand to the ubiquitous presence of noodles in celebratory feasts.

Rice Noodles

Rice noodles are a staple in many Asian cuisines, celebrated for their light texture and ability to absorb flavours. Made from rice flour and water, these noodles come in various shapes and sizes, from thin vermicelli used in salads and soups to wider, flat varieties perfect for stir-fries and curries.

Their gluten-free nature makes them a popular choice for those seeking alternatives to wheat-based noodles.

Glass Noodles

Glass noodles, also known as cellophane or mung bean noodles, are another staple in Asian cuisine. Made from mung bean starch, these translucent noodles have a delicate texture and will absorb the flavours of the dishes they are cooked in. Hugely versatile, they can be stir-fried, added to soups, or included in cold salads.

Because they are naturally gluten-free and low in calories, they make an appealing option for those looking to enjoy a lighter meal.

Other Noodles

In addition to the more commonly known types, Asian cuisine boasts an impressive array of other noodle varieties that contribute to its rich culinary tapestry. For instance, buckwheat soba noodles, originating from Japan, are famed for their nutty flavour and firm texture, often enjoyed cold with dipping sauces or in warm broths.

The uniquely textured Korean jjajangmyeon, known for its black bean sauce, showcases the adaptability of noodles across different dishes. Each type of noodle has its own unique qualities and preparations that enrich meals and showcase the diversity within Asian culinary traditions.

Regional Asian Noodle Dishes

It would be impossible to cover the vast range of regional noodle dishes, but those outlined below serve as an introduction to some of the more well-known dishes and cuisines.

Chinese Noodle Dishes

Chow Mein

Stir-fried noodles with vegetables and a choice of protein, often seasoned with soy sauce and other spices.

Lo Mein

Soft egg noodles tossed with vegetables and protein in a savoury sauce, known for its rich flavours.

Dan Dan Noodles

Spicy, Sichuan-style noodles topped with minced pork, preserved vegetables, and a spicy sauce.

Beef Chow Fun

Wide rice noodles stir-fried with tender beef, bean sprouts, and scallions, offering a delightful texture.

Noodle Soup

A comforting dish featuring thin wheat noodles served in a rich broth, often garnished with vegetables and proteins.

Zha Jiang Mian

Noodles topped with a fermented soybean paste typically served with fresh vegetables and minced pork.

Japanese Noodle Dishes

Ramen

Perhaps the most famous Japanese noodle dish, ramen consists of wheat noodles served in a hearty broth, accompanied by toppings like sliced pork, nori, and green onions. Each region in Japan has its own unique style of ramen, varying in broth ingredients and noodle thickness.

Udon

Thick and chewy wheat noodles, udon is typically served in a light soy or broth and can be enjoyed hot or cold. It’s often topped with tempura, green onions, or a raw egg for extra richness.

Soba

As previously mentioned, soba noodles are made from buckwheat and are celebrated for their nutty taste. They’re usually served chilled with a dipping sauce or in a warm broth as part of a more substantial dish.

Tsukemen

These are dipping noodles that are served separately from the broth, allowing you to immerse the cold noodles into a hot, flavorful sauce just before eating.

Yaki Udon

Stir-fried udon noodles with a selection of vegetables and protein, seasoned with soy sauce and other spices, creating a deliciously balanced meal.

Thai Noodle Dishes

Pad Thai

A beloved stir-fried dish made with rice noodles, tossed together with shrimp or chicken, eggs, bean sprouts, and peanuts, all coated in a tangy tamarind sauce.

Pad See Ew

Thick rice noodles stir-fried with soy sauce, broccoli, and your choice of protein, creating a savoury and slightly sweet flavour profile.

Khao Soi

A comforting coconut curry noodle soup featuring egg noodles topped with crispy noodles, pickled mustard greens, and a choice of chicken or beef.

Drunken Noodles (Pad Kee Mao)

Wide rice noodles cooked with fresh vegetables, basil, and a spicy sauce, usually ranging from mild to hot. Perfect for those seeking a bit of heat.

Yen Ta Fo

A vibrant noodle soup made with pink seafood-based broth, rice noodles, and an array of toppings including fried tofu, fish balls, and vegetables.

Vietnamese Noodle Dishes

Phở

A fragrant noodle soup consisting of rice noodles, herbs, and usually beef or chicken, served with a clear broth that simmers for hours to develop deep flavour.

Bún Thịt Nướng

This dish features vermicelli noodles topped with grilled pork, fresh herbs, crushed peanuts, and a drizzle of nuoc cham, a tangy fish sauce dressing.

Mi Quang

A Central Vietnamese dish made with turmeric rice noodles, often accompanied by a variety of meats, herbs, and a small amount of broth, garnished with peanuts and sesame crackers.

Bánh Huế

A spicy noodle soup from Huế, showcasing thick rice noodles, shrimp, and pork, flavoured with lemongrass and often garnished with mint and lime.

Cao Lầu

A regional speciality from Hội An, this dish includes thick rice noodles, slices of pork, fresh herbs, and a small amount of broth, with a unique texture due to its preparation method using water from a local well.

Korean Noodle Dishes

Japchae

A sweet and savoury dish made with stir-fried glass noodles, vegetables, and often beef or other proteins, seasoned with soy sauce and sesame oil. It’s loved for its chewy texture and colourful presentation.

Ramyeon

A beloved instant noodle dish that comes in various flavours typically served in a spicy broth with toppings like egg, green onions, and sometimes cheese for a creamy twist.

Kuy Teav

This noodle soup, often enjoyed for breakfast, features rice noodles in a light broth, garnished with herbs, lime, and a choice of meats, such as pork or seafood.

Naengmyeon

Cold buckwheat noodles served in a refreshing broth, perfect for hot days. It’s usually topped with slices of pear, cucumber, and a hard-boiled egg.

Jajangmyeon

A popular dish consisting of wheat noodles topped with a rich black bean sauce, often made with diced pork and vegetables, offering a hearty and flavorful meal.

These examples only scrape the surface of the huge repertoire of noodle dishes across Asia, each showcasing the differences between each cuisine in terms of ingredients and flavour profiles. We will be exploring each in more detail, with the aim to inspire and educate, but most of all to get you cooking some delicious Asian noodle dishes of your own.

Explore our range of Asian organic store cupboard staples.


This article was reproduced on this site with permission from operafoods.com.au the “Asian Groceries Wholesaler”.
See original article:- What Are The Different Types of Asian Noodle Dishes?

Miso Butter Makes Everything Taste Better

miso butter

When it comes to elevating the flavours in your dishes, few ingredients can compete with miso butter.

This dynamic duo brings together the umami richness of miso and the creamy indulgence of butter, resulting in a versatile condiment that’s perfect for enhancing a variety of meals. Whether you’re spreading it on toast, mixing it into sauces, or using it as a finishing touch on roasted vegetables, it adds a unique depth of flavour that is both comforting and exciting.

Let’s dive into why miso butter is the magic ingredient your kitchen has been missing.

What is Miso Butter

It is a compound butter, which is simply butter mixed with aromatics that you use to add easy flavour to your food. Like a flavour bomb.

Because miso is deeply savoury, when added to butter it is an excellent way of boosting the umami flavour of a dish. Not only is butter the ideal vehicle for melting into food, but it brings its own silky rich textures and creamy taste with it too.

What does miso taste like?

Miso has a unique and complex flavour profile that can be described as salty, tangy, and slightly sweet, with a rich, savoury depth known as umami.

The taste of miso can vary significantly depending on the type and fermentation process. For instance, white miso (shiro miso) has a milder, sweeter taste, while red miso (aka miso) is more robust and salty.

This depth of flavour not only adds complexity to dishes but also enhances the flavour of other ingredients.

Using the qualities of umami wisely can not only elevate your dish in terms of flavour but also give an illusion of richness and body. This is why a touch of miso butter is such a useful secret weapon in the kitchen.

What is Miso Butter Made Of?

The simplest is just miso paste mixed with butter. Because it is so simple used in this way it really is like a magic ingredient that nobody knows is there.

The magic has as much to do with the butter as the miso. Although you can use a vegan alternative, and it is a great way to mimic the savoury depth of meat, you do miss out on the very qualities of real dairy butter that make it so good. Because butter makes everything better.

Use good quality unsalted butter, as miso is already salty. You can always add more salt if you feel you need to.

Basic Miso Butter Recipe

Ingredients:

  • 1/2 cup unsalted butter, softened
  • 2 tablespoons miso paste (white miso for a milder taste or red miso for a stronger flavour)

Instructions:

  1. Soften the Butter: Ensure your butter is at room temperature for easy mixing.
  2. Mix with Miso: In a small bowl, combine the softened butter and miso paste. Mix thoroughly until the miso is evenly incorporated into the butter.
  3. Shape and Chill: Transfer the mixture onto a piece of plastic wrap or parchment paper. Roll it into a log shape and twist the ends to seal. Chill in the refrigerator for at least 1 hour to allow the flavours to meld together.
  4. Serve: Slice into rounds and use as desired.

How to store miso butter

For additional protection, you can place the wrapped log into an airtight container or zip-top freezer bag. It will keep in the fridge for up to two weeks or you can freeze it for up to three months. When you’re ready to use, simply slice off the needed amount and let it soften at room temperature for a few minutes.

What To Eat With Miso Butter

Spread on Toast or Bread: Elevate your morning routine by spreading on your favourite toast or freshly baked bread.

Melt Over Steamed Vegetables: Add a rich, umami flavour to steamed vegetables like broccoli, green beans, or asparagus.

Stir into Mashed Potatoes: Mix into mashed potatoes for an extra creamy and flavourful side dish.

Use as a Sauce for Fish: Top grilled or baked fish to enhance its natural flavours.

Mix into Pasta: Toss into pasta and add a splash of pasta water for a quick, delicious meal.

Roast Meats: Rub under the skin of chicken or spread over a pork roast before baking for a savoury, caramelized crust.

Grill Corn on the Cob: Slather on corn on the cob before grilling for a unique twist on a summer staple.

Sauté Mushrooms: Cook mushrooms in miso butter for a deeply savoury side dish or topping.

Finish Soups: Stir a small amount into soups just before serving to add depth and richness.

Season Rice: Mix into cooked rice for an easy, flavourful upgrade.

Variations on Miso Butter

How to make your miso butter even better?

Garlic: Add minced garlic for an extra aromatic kick. Perfect for spreading on bread or melting over grilled meats.

Spicy: Mix in a bit of chilli paste or sriracha to give some heat. Great for adding a spicy twist to vegetables or seafood.

Herbed: Incorporate finely chopped herbs like parsley, chives, or thyme. This variation works wonderfully as a finishing touch for roasted meats or vegetables.

Lemon: Add a splash of lemon juice and some lemon zest. This bright and tangy option pairs beautifully with fish or steamed greens.

Sesame: Stir in toasted sesame seeds or a drizzle of sesame oil to give your miso butter a nutty, deep flavour. Ideal for Asian-inspired dishes or as a topping for rice bowls.

Honey: Combine with a bit of honey for a sweet and savoury blend. Try it on toast or as a glaze for roasted carrots or sweet potatoes.

Nori: Crush some nori (seaweed) and mix it in. This variation brings a subtle oceanic flavour that’s delightful on seafood or mixed into rice.

We hope to have shown you that miso butter is a versatile and delicious addition to your kitchen, offering endless possibilities for enhancing your favourite dishes. Whether you choose to experiment with garlic, spice, herbs, or other unique variations, the fusion of miso and butter provides a rich, umami-packed punch that will elevate your food to new heights.

Explore our other Asian groceries for more delicious taste adventures.


This article was reproduced on this site with permission from operafoods.com.au the “Asian Groceries Wholesaler”.
See original article:- Miso Butter Makes Everything Taste Better

Is Soy Sauce Gluten Free?

is soy sauce gluten free

Is soy sauce gluten free? If you love the savoury depth that soy sauce adds to dishes but are also mindful of gluten in your diet, then this may be something that you need to consider. In this article, we will take a look at how traditional soy sauce is made and why it may actually contain gluten. Then, we will examine tamari soy sauce and why it is an excellent substitute for traditional soy sauce in your gluten free diet.

What is Soy Sauce?

Soy sauce is a condiment that originated in China more than 2,500 years ago. It’s traditionally made through a process of fermentation using soybeans, wheat, salt, and a specific type of mould called Aspergillus. This mixture is left to ferment for several months, which results in the rich, umami flavour that’s characteristic of soy sauce. This is then pressed to extract the liquid, which is pasteurized and bottled ready for use.

Is traditional soy sauce gluten free?

So no, traditional soy sauce is not gluten free. The inclusion of wheat as a primary ingredient in the fermentation process means that traditional soy sauce contains gluten. While the end product is often filtered, the gluten proteins from the wheat remain in the sauce. Therefore, individuals with celiac disease or gluten sensitivity should avoid traditional soy sauce.

Does all soy sauce contain gluten?

Fortunately, not all soy sauce contains gluten. There are gluten free alternatives available, and one such option is Tamari. Tamari is a Japanese version of soy sauce, typically made without wheat, making it a suitable option for those following a gluten free diet. Another alternative is soy sauces labelled as gluten free. These products are made with rice instead of wheat, ensuring they are safe for individuals with gluten intolerance. Always remember to check labels carefully to ensure you’re choosing a gluten free soy sauce.

What is Tamari Sauce?

Tamari sauce originated in Japan during the 7th century and is a byproduct of the process of making miso paste. Historically, it was collected from the liquid that seeped out of the casks containing fermenting miso. Its name comes from the Japanese verb ‘tamaru’ which means ‘to accumulate’. While Tamari is commonly known as a type of soy sauce, it’s important to note that its flavour profile is slightly different. As it is typically made without wheat, it has also found popularity among the gluten free community.

How is tamari sauce made?

Tamari sauce is made by fermenting soybeans, salt, and sometimes a small amount of rice. The process begins with soaking the soybeans in water and then cooking until soft. Next, they’re mixed with a mold called Aspergillus oryzae and allowed to ferment for about three days. This creates a mixture called koji, which is then combined with salt and water to create what’s known as a moromi mixture. The moromi is left to ferment for several months, during which enzymes from the koji break down the soybeans’ proteins, fats, and starches into flavour components.

After fermentation, the mixture is pressed to separate the solids from the liquid, which results in Tamari sauce. The sauce is then pasteurized to kill any remaining bacteria and extend shelf life, after which it’s ready to be bottled and sold.

What’s the difference between tamari and soy sauce?

Despite their similar appearances, Tamari and soy sauce are actually quite distinct. The primary difference lies in their ingredients and production process. Traditional soy sauce is made with a nearly equal ratio of soybeans to wheat which results in a thinner, slightly saltier sauce. Tamari, on the other hand, is made mostly, if not entirely, from soybeans. This yields a sauce that is thicker, less salty, and richer in flavour. In addition, Tamari tends to have a darker colour and a more balanced, less harsh taste compared to soy sauce.

Is tamari gluten free?

Yes, as it is made without wheat, most tamari can be considered gluten free. It is however always wise to check the label.

Is tamari better for you than soy?

Tamari could be considered healthier than soy sauce for some individuals, particularly those who are sensitive to gluten. In terms of sodium, tamari and soy sauce are quite similar, although some might find tamari to be slightly less salty. Additionally, due to the higher concentration of soybeans, tamari may have a richer nutrient profile than soy sauce.

What does tamari soy sauce taste like?

Tamari is often described as smoother, richer, and less salty compared to traditional Chinese soy sauce.

Can I substitute soy sauce with tamari?

Yes, you can substitute soy sauce with tamari. Tamari, being less salty and smoother in taste, can be an excellent alternative to soy sauce. As we have seen, it is particularly useful for those looking to reduce their gluten intake, as it’s typically gluten free.

However, it’s important to remember that because of the differences in flavour profile, the end result of the dish might taste slightly different. In recipes where soy sauce is a minor ingredient, this change will likely be subtle. For dishes where soy sauce is a key component, you may notice a richer, less salty taste with tamari.

Our tamari soy sauce is 100% organic and gluten free

Using Tamari Soy Sauce to Enhance Your Cooking

We have already seen that tamari is an excellent gluten free alternative to soy sauce and that unless you are looking for a very specific flavour profile (such as in an authentic traditional dish) it can be used instead of soy sauce in most instances.

Tamari sauce can be used in a variety of ways in the kitchen. Use it as a marinade for your proteins to infuse them with a deep, umami flavour, add a dash to your stir-fries for an instant flavour boost, or drizzle it on your sushi and sashimi just like you would with soy sauce. Tamari’s less salty, richer flavour profile also makes it an excellent dipping sauce, offering a smooth, savoury experience for your taste buds. Remember, a little goes a long way with tamari sauce, so use sparingly to start!

If you are just starting out on your gluten free diet you may find our guide to gluten free food useful.

Explore our range of gluten free groceries.


This article was reproduced on this site with permission from operafoods.com.au the “Gluten Free Grocery Suppliers”.
See original article:- Is Soy Sauce Gluten Free?

The Ultimate Guide to Making Sriracha Mayo

how to make sriracha mayo

If you’re a fan of spicy foods, then you must have tasted sriracha sauce at some point in your life. This iconic condiment is known for its unique blend of heat and tanginess, making it a favourite amongst foodies and chefs alike. But have you tried sriracha mayo yet? This spicy mayonnaise sauce is a super tasty addition to, well just about anything. In this article, we’ll take you through everything you need to know about making homemade sriracha mayo.

What is Sriracha?

Sriracha is a type of hot sauce, originally from Thailand, made from chilli peppers, vinegar, garlic, sugar, and salt. Its tangy, spicy, and slightly sweet flavour has gained it immense popularity worldwide, and it is now a staple condiment in many kitchens.

How hot is sriracha?

Sriracha is considered moderately spicy on the Scoville scale. It ranks at about 1,000-2,500 Scoville heat units (SHU). For comparison, Tabasco sauce ranks at about 2,500-5,000 SHU. So while it does provide a noticeable kick, it’s not as fiery as some other hot sauces on the market. Its heat is balanced by its tangy, garlicky flavour, which also makes it exceptionally moreish. Even if you aren’t a chilli head, you may find that sriracha keeps you going back for more.

Another excellent way of enjoying sriracha, and also turning down the heat, is to make your own sriracha mayonnaise. Which not only goes with absolutely everything but manages to elevate every single flavour too.

What is Sriracha Mayo Made of?

Sriracha mayo is a simple sauce made from two main ingredients – mayonnaise and sriracha sauce. Mayonnaise is made from oil, egg yolks, vinegar, salt and usually mustard. As we have seen, sriracha sauce is made from chilli peppers, garlic, vinegar, sugar, and salt. When these two ingredients are combined, they create a spicy and creamy sauce that is perfect for adding extra flavour and heat to your favourite dishes.

Super Easy Sriracha Mayo Recipe

Although you can buy ready-made sriracha mayo, we think it is far better to make it at home. That way you have complete control over the quality of your ingredients, and can also adjust the heat level to your liking. It couldn’t be easier, especially if you use store-bought mayo. We do recommend giving it a go from scratch though. Once you discover how easy it is to make really good mayo at home you won’t ever look back. Here’s our basic sriracha mayonnaise recipe. Feel free to tweak it to your liking. Some people like to add extra garlic but we don’t think it needs it. Keep it simple!

Sriracha Mayo Ingredients

So, what’s this spicy mayo made of? You’ll only need three ingredients to make it, and they are:

How to Make Homemade Sriracha Mayo

Making homemade Sriracha mayo is super easy, and only takes a few minutes.

  1. In a medium-sized bowl, combine the mayonnaise, sriracha sauce, and lime juice.
  2. Taste the sauce and adjust the seasoning if necessary. If you want the sauce to be spicier, add more sriracha sauce.
  3. Transfer the sauce to an airtight container and refrigerate it until you’re ready to use it.

How long will my homemade sriracha mayo keep?

Your homemade sriracha mayo can be stored in the refrigerator for up to two weeks. The key is proper storage: ensure it’s kept in an airtight container and stored at a temperature less than 40°F (4°C). Always use a clean utensil when serving it, and never return unused sauce back to the jar.

But what if I want to make it from scratch? Can I make my own mayonnaise first?

How to Make Homemade Mayonnaise

Homemade mayo is really not as scary as its reputation would have you believe. The best way is to use a stick blender and a tall container like the one the blender usually comes with. Using a whole egg makes it far more stable, helps it keep for longer, and the results are less eggy and closer to shop-bought mayo. Which is not always a bad thing, right?

Ingredients for homemade mayo

We use rice vinegar for its lovely mild sweet flavour.

  • 350ml sunflower oil
  • 1 tsp flaked sea salt
  • 1 tbsp rice vinegar
  • 1 whole egg
  1. Pour the oil into the tall container (it often has measurements down the side).
  2. Add the salt and the vinegar.
  3. Crack the egg into a small bowl, without breaking the yolk.
  4. Pour the egg carefully down the side of the container, again so the yolk doesn’t break. It is no major catastrophe if it does break, but it seems to help if it stays intact.
  5. Place the head of the stick blender over the yolk, and begin to blitz continuously. You will see ribbons of mayonnaise beginning to form at the bottom.
  6. Slowly move the blender upwards, allowing the mayonnaise to form around it.
  7. Once you reach the top of the oil, the mayo will be pretty much formed. Keep blitzing, on and off, moving the blender up and down to ensure everything is combined.
  8. Transfer to a clean glass jar.
  9. Keep in the fridge for up to two weeks; preferably use it within 1 week to be on the safe side.

How to Use Sriracha Mayo

Sriracha mayo is an incredibly versatile sauce that can be used in many ways. Here are some ideas:

  • Use it as a spread on burgers and sandwiches for an extra kick of heat and flavour.
  • Dip your fries, onion rings, or vegetables in this sauce for a zesty dip.
  • Drizzle it over grilled chicken, fish, or steak to add some depth of flavour to your dishes.
  • Mix it with your coleslaw or potato salad for a spicy twist on a classic side dish.

We hope you enjoyed this article and are ready to give our sriracha mayo recipe a go. If you’re a fan of sriracha sauce and mayonnaise, then you’re going to love it. This tasty spicy mayo is super easy to make at home, and it’s perfect for elevating all your favourite dishes. Remember that you can always adjust the spiciness level of the sauce to your liking by adding more sriracha sauce.

Explore our full range of authentic organic Asian sauces, spices and condiments.


This article was reproduced on this site with permission from operafoods.com.au the “Asian Grocery Online Wholesalers”.
See original article:- The Ultimate Guide to Making Sriracha Mayo

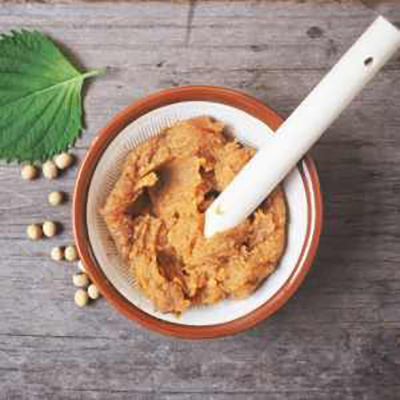
The Art of Flavour: An Introduction to Miso Paste

Miso Paste Ideal Ingredient

Miso paste is a cornerstone ingredient of traditional Japanese cuisine, yet its versatility goes way beyond just Japanese food. Now popular across the world, miso paste is known for its powerful umami punch, and a seemingly magical ability to add depth and complexity to your cooking.

But, exactly what is miso paste? Whether you are new to this must-have ingredient or are perhaps already familiar with it yet want to know more, read on to discover more about its unique flavour, nutritional benefits, and how to incorporate it into your cooking.

What is Miso Paste?

Miso paste is a fermented food made primarily from soybeans, grains (rice or barley), salt, and a type of fungus known as koji. Although it is a staple ingredient in many Asian cuisines, it has its origins in Japan, where it has been used for over a thousand years.

The age-old process of making miso involves a slow fermentation process which can last for a few weeks up to several years, depending on the desired flavour and texture. The distinct umami taste, often described as savoury, meaty, rich, and full-bodied, comes from this fermentation process.

The different types of miso paste

Although there are several thousand different kinds of miso paste in Japan we can categorise them into a few basic types, each with its own distinct flavour profile. Most of these are made with grains (most often rice) but there are varieties made without.

White miso (known as genmai shiro) is the mildest type, with a sweet, subtly salty flavour ideal for dressings, marinades, and light soups.

Red miso is fermented for a longer period than white miso, resulting in a more potent, salty flavour that is more suited to robust soups and stews.

Mixed miso is a blend of red and white miso, that strikes a balance between the two in terms of flavour.

Lastly, there’s the less common barley miso, which is made by fermenting barley along with soybeans and koji for a particularly distinctive taste.

The Flavour Profile of Miso Paste

The flavour profile of miso paste is complex and multi-layered, lending a unique depth to any dish. It has a deep, savoury flavour that is at once salty, sweet, and slightly tangy. The taste can also range from the mildly earthy delicate sweetness of white miso to the bold and hearty pronounced saltiness of red miso. This wide spectrum of flavours is what gives makes miso paste such versatility; an ingredient capable of elevating a simple dish to an extraordinary one.

The unique umami taste

Using miso paste to its full potential in your cooking requires a certain understanding of the concept that is umami.

The umami taste of miso paste is one of its defining attributes. Umami is now known to be the fifth taste alongside sweet, sour, bitter, and salty; a sensation which is the result of the glutamate produced during the fermentation process. Interestingly, the term is actually Japanese and means “pleasant savoury taste”.

Umami is characterized by a deep, rich, satisfying flavour that lingers on the palate. It contributes to not just the depth of flavour of a dish but a richness in the mouth known as body. It’s this umami taste that gives miso paste its unique depth of flavour, adding complexity to dishes with its savoury, slightly sweet, and full-bodied character.

Sweetness in white miso

The sweetness of white miso sets it apart from the darker, more robust varieties of miso paste. Because of its shorter fermentation time, this type of miso is lighter in colour and has a milder flavour. Less salty, it allows for the natural sweetness from the fermented rice to shine through more prominently. This inherent sweetness, combined with a subtle umami undertone, gives it a well-rounded flavour profile that enhances dishes without overpowering them.

White miso imparts a gentle sweetness that harmoniously blends with other ingredients, creating a beautifully balanced dish.

Our white miso is made with only organic ingredients and is naturally fermented

The salty punch of red miso

Red miso has a bold, pronounced saltiness, that delivers a punch of flavour. A longer fermentation process gives it a darker colour and a robust taste. The salty punch of red miso doesn’t just add saltiness to a dish though, but a rich complexity and layers of flavour.

Made with rich, bold red miso, our authentic Japanese instant miso soup is a quick way to reach full umami flavour.

The balanced blend of mixed miso

Mixed miso strikes a perfect balance between the gentle sweetness of white miso and the bold depth of red miso. The perfect blend of these two varieties results in a complex, harmonious flavour profile that offers deeply satisfying flavour whilst retaining some sweetness and subtle nuances.

Blending miso is an art in itself, and can result in a multitude of different flavour profiles.

The distinctive taste of barley miso

Barley miso, unlike the more common varieties of miso that are made with rice, involves a unique fermentation process using barley. It undergoes a longer fermentation period, which gives it its characteristic strong, rich, and slightly sweet flavour with a hint of malted barley.

The Nutritional Benefits of Miso Paste

Miso paste is celebrated not only for its unique, umami-rich flavour but also for its impressive nutritional profile. It’s packed with essential nutrients that contribute to a well-rounded, balanced diet.

One of the essential benefits of miso is its rich protein content. As a soy-based product, miso is an excellent source of plant-based protein, making it a valuable ingredient for vegetarians and vegans. I

Furthermore, miso is a fermented food, which means it’s a source of probiotics – beneficial bacteria that support gut health. The fermentation process also assists in breaking down the nutrients in miso, making them more easily absorbed by the body.

All varieties of miso are rich in several vitamins and minerals. These include B vitamins, which are crucial for energy production and cognitive function, and minerals like zinc, manganese and copper, all of which play a role in maintaining overall health and well-being. Miso is also an excellent source of vitamin K.

However, it’s important to note that miso is high in sodium, so it should be used in moderation, especially for those monitoring their salt intake.

Using Miso Paste in Cooking

Miso paste can bring a little magic to any number of dishes. While it’s traditionally known for its role in Japanese miso soup, its umami richness can elevate many other recipes, infusing them with a deep, savoury character.

  1. Miso Roasted Vegetables: Toss your favourite veggies in a mixture of miso, a little olive oil, and herbs before roasting for a savoury side dish.
  2. Miso Glazed Salmon: Brush salmon fillets with a glaze of miso, soy sauce, and a touch of honey before baking or grilling.
  3. Miso Salad Dressing: Combine miso with rice vinegar, sesame oil, and a bit of ginger to make a flavorful dressing for salads.
  4. Miso Ramen: Use miso paste as the base for a comforting bowl of ramen, adding noodles, veggies, and your protein of choice.
  5. Miso Stir-fry: Add a spoonful of miso to your stir-fry sauce for an umami-rich depth of flavour.
  6. Miso Marinade: Use miso, sake, and mirin to marinate tofu, chicken, or beef before grilling.
  7. Miso Butter Pasta: Melt miso into butter to make a rich, savoury sauce for pasta.
  8. Miso Soup: Of course, miso is a key ingredient in the traditional Japanese soup, often served with seaweed and tofu.
  9. Miso Baked Eggs: Swirl a bit of miso into a tomato sauce, crack in some eggs, and bake for a unique breakfast dish.
  10. Miso Hummus: Blend miso into your standard hummus recipe for an unexpected twist on the classic.

As you experiment with miso in your cooking, remember that its flavour is potent, so a little goes a long way. Also, due to its high sodium content, you may need to adjust the amount of additional salt used in your recipes. A great way to experiment with miso is to use it in place of salt so why not give it a go and see what you can come up with?

How to Store Your Miso Paste

Once opened, miso paste should be stored in an airtight container in the refrigerator where it will keep its quality for up to a year. Remember, the paste tends to darken over time, but this doesn’t indicate spoilage. As long as it’s kept cool and tightly sealed, miso paste can be a long-lasting and versatile ingredient in your kitchen.

So, are you ready to explore the endless possibilities of miso paste?

As we have seen, the exceptional versatility and rich flavour profile of miso paste make it a really useful ingredient in any kitchen. From soups and stews to sauces and dressings, miso paste gives your food a unique depth of flavour that belies its simplicity. Way more than just a cornerstone of Japanese cuisine, this remarkable ingredient can transform your cooking. With its impressive shelf-life and endless possibilities, it could just become your go-to ingredient.

Enjoyed this article? Read more about the health benefits of fermented foods.

Have you tried our organic kombucha yet?


This article was reproduced on this site with permission from operafoods.com.au the “Your Asian Organics Grocery Suppliers”.
See original article:- The Art of Flavour: An Introduction to Miso Paste

How to Make Honey Soy Sauce

honey soy chicken wings

Honey soy sauce is having a bit of a moment. Used to make deliciously sticky honey soy chicken, yet it also has many other uses. Here’s how to make honey soy sauce, and some ideas on what to do with it.

What is honey soy sauce?

More Western than authentically Asian, honey soy sauce is a sweet savoury sauce that can be used as a dipping sauce, as a marinade, or as a cooking sauce. Reduced down a little it makes an excellent glaze for brushing and it can also be thickened up to make a serving sauce.

Ways to use honey soy sauce

Honey soy sauce goes especially well with chicken thighs or wings and salmon fillets, but can also be used with pork. Think ribs, or sticky belly pork. Enhance the inherent sweetness of vegetables by using as a stir fry sauce, a dipping sauce for simple vegetable tempura or spring rolls, or as a glaze for grilling.

How to make honey soy sauce.

Essentially it begins life as a marinade. A simple, non-thickened blend of soy, honey and garlic. Apart from the addition of honey, it  is a lot like teriyaki sauce.

(btw, if teriyaki is more your style, check out our guide to making great teriyaki chicken.)

You could use this very simple sauce as a dipping sauce, but it is through cooking and the alchemy of honey, soy, and garlic, that it really comes into its own.

The point of the sauce is the honey. Yes, its sweetness and powers of caramelisation, but also its flavour. So use the best honey that you can. Also this is not honey added to soy; it is soy added to honey. The honey is the greater part.

Garlic seems to be non-negotiable. But you do need to be careful with garlic. In the oven it will cook down to a beautiful sweetness. On the grill it can burn and leave an unmistakeably acrid taste. So we add a greater quantity of whole cloves and let those infuse, rather than chopped garlic.

Although the quintessential trio of soy, honey and garlic works well, you can boost it a bit from there according to taste. We added…

  1. Rice vinegar for a little acidity.
  2. Sesame oil for toasted warmth.
  3. Chili (flakes or fresh) for a back end bite.
  4. Shaoxing wine for a more rounded depth.
  5. Slices of fresh ginger for more complexity.

Basic recipe for honey soy sauce

Use this as a marinade for grilling or as a bake in sauce. For a dipping sauce, let the flavours infuse for several hours before serving.

1/2 cup honey

1/3 cup soy sauce

1/4 cup shaoxing wine or water

2 tbsp rice vinegar

1 tsp sesame oil

4 whole cloves garlic, peeled and lightly smashed

2 slices fresh ginger

Sliced fresh chili (as desired)

  1. Peel the whole garlic cloves. To lightly smash, use the flat of a knife and smash down with the heel of your hand. The clove should remain whole, yet split to release its flavour.
  2. Stir all of the ingredients together and add the ginger, garlic, chilli. The longer you leave this before using, the more intense the flavours will become.

To create a glaze, add the above sauce into a small pan and simmer gently to reduce by about one third.

To create a thicker serving sauce, add the above sauce into a sauce pan and bring to the boil. Whisk in a heaped teaspoon of cornflour, mixed with a little water to form a paste. Whisk for a few minutes until thickened.

Recipe for baked honey soy chicken thighs

1 quantity of honey soy sauce (see above)

8 chicken thighs, skin on and bone-in

6 spring onions, in 1 inch pieces

To garnish

1 tbsp toasted sesame seeds

2 spring onions, chopped

  1. Pre-heat the oven to 180C.
  2. Place the chicken thighs in an ovenproof dish or roasting tin and add the spring onion pieces.
  3. Pour over the sauce.
  4. Bake in the oven for about an hour, until the chicken is tender and the sauce is sticky.
  5. Scatter with the chopped spring onion and sesame seeds before serving with some plain rice or noodles.

Why not try using the sauce as a simple marinade for chicken wings before grilling. Or if you thicken the sauce slightly to create a glaze, you can brush it over salmon fillets or vegetables whilst they cook.

Our guide on the food and ingredients of South East Asia is an excellent overview of this massive topic. Or why not explore our range of authentic Asian sauces.


This article was reproduced on this site with permission from operafoods.com.au the “Asian Organic Foods Suppliers”.
See original article:- How to Make Honey Soy Sauce

All About Thai Curry Pastes

thai-curry-paste

Thai curry pastes form the basis of all Thai curries. But what exactly is a curry paste, and how do you use it? In this article we look at why curry pastes are an essential ingredient of so many curries, before taking a more detailed look at some classic Thai curries.

Introduction to curry pastes

Curry pastes vary from cuisine to cuisine and not just in flavour but in the way that they are used. A curry paste is simply an aromatic paste made up of wet spices, possibly with the addition of herbs and dried spices. Wet spices are fresh spices such as ginger, galangal, garlic, chili, lemongrass, tamarind, and shallots. They lend fresh, sharp, aromatic flavours to the curry, and also add body to a sauce.

How curry paste is made.

Curry paste is made by blending together a combination of wet and dry spices, possibly with the addition of fresh herbs, and helped along with a little oil and salt. The traditional way is in a large coarse bowl with a coarse stick (known as a mortar and pestle) but a processor or blender could also be used.

Can you curry paste instead of curry powder?

The quick answer here is no. Yes, there are ways around everything; if you only had dry spices available, for example, then you could certainly recreate some of the flavours. But wet spices and dry spices are two very different things, that serve completely different purposes.

The difference also lies within the cuisines themselves. In Indian curries, the wet spices are cooked first to form the base and then dry spices are added at various stages to layer the flavours throughout the dish. Commercial spice pastes may be used by the home cook for convenience, yet these differ from curry pastes in that they are mostly dry spices mixed with oil. In Thai curries, the curry paste contains all of the aromatic ingredients, wet and dry, and is cooked into the liquid. Usually coconut milk.

Does curry paste need to be cooked?

Curry paste needs to be cooked to release the aromatic flavours, and allow all of the flavours of the dish come together. The fibres within the wet spices also need time and heat in order to soften.

When to use curry paste.

Curry paste is used at the beginning of the dish. Added first to the hot pan, with a little extra oil, it is cooked out for several minutes before adding subsequent ingredients.

How much curry paste to use.

Whereas a spice paste is a highly concentrated blend of dry spices and oil that is used maybe a tablespoon at a time, curry paste is not so concentrated and is designed to form the entire base of the dish.

Recipes, and individual tastes, vary wildly but as a general rule of thumb use 5 to 6 tablespoons (around 120g) of paste to each 400ml tin of coconut milk.

Thai curry pastes

Thai curries have become immensely popular for their super fragrant heat. For the home cook, they are are also quick and easy to make. There are three basic Thai curry pastes; red, green and yellow. There is another Thai curry that has become immensely popular so worth a mention, and that is Massaman curry.

Massaman curry paste.

Massaman curry is closer in flavour to Indian curries than your usual fragrant Thai curry profile, due to its Indian and Malay roots. Made most often with beef, alongside potatoes in a rich spicy peanut sauce, it has a signature smoky feel that comes from toasting all the ingredients from which the curry paste is made.

Massaman curry paste is made with galangal, garlic, shallots, and dried red chillies as well as toasted cumin, nutmeg, cloves, cardamom, cinnamon and coriander. Black cardamom has a lovely smoky richness all of its own.

Red curry paste.

Red Thai curry, contrary to popular belief, is milder than Thai green curry. It is the ‘medium’ of the three major coconut curry styles. It is made with red chillies as well as shallots, galangal, garlic and lemongrass. From there, depending on the (often secret) recipe other spices may be added.

Try our organic Thai red curry paste

Thai green curry paste.

Thai green curry is the hottest of the Thai standard curries. Alongside the usual shallots, ginger/galangal, lemongrass and garlic combo, it uses green chillies, plenty of Thai basil, and also kaffir lime leaf, to create a fiery yet fragrant curry.

Thai yellow curry paste.

Thai yellow curry is considered to be the mildest of the Thai curries. The yellow colour comes from plenty of turmeric, which is a grounding earthy spice that rounds out flavour. It usually features a little cumin too, as well as the ubiquitous fragrant wet spices.

Try our organic Thai yellow curry paste

Explore more exciting flavours in our in-depth guide to Southeast Asian cuisines and ingredients.

Our authentic range of organic Asian sauces and spices is sourced from small-scale producers throughout Australasia.


This article was reproduced on this site with permission from operafoods.com.au the “Asian Grocery wholesaler”.
See original article:- All About Thai Curry Pastes

Our guide to Korean fried chicken (with recipe)

korean fried chicken

Korean fried chicken is essentially crispy fried chicken in a sweet chilli sauce. There are actually several variations of this popular snack yet outside of Korea we tend to focus on the sticky sweet/spicy version.

What is the difference between Korean fried chicken and regular fried chicken?

Korean fried chicken is known for its light and crunchy crust with soft tender meat and moreish seasoning. It is the polar opposite of the thick (often greasy) crust and heavy handed approach of its southern counterpart. Everything about Korean fried chicken has a lighter touch, right down to its side serving of pickled radish and cold frosted beer.

So, what makes Korean fried chicken so different?

Korean fried chicken is best made with small chickens, for soft tender meat. The whole bird is used, cut into small pieces that are left on the bone. The best place to get chicken like this is actually your local halal butcher; ask for whole baby chicken, skin on, in pieces.

Any marinade is kept to a minimum, and the chicken is dipped in a thin batter then double fried at a relatively low temperature. Any bits of batter and bubbles in the crust are shaken off, for a smooth crackly crust.

Although it can be served plain, there are sauced varieties. The sauce is brushed, like a thin glaze, onto the hot crust. Think subtle seasoning as opposed to soaking.

Considered a snack, rather than a meal (karaoke and chicken lounge, anyone?) Korean fried chicken is a thing of glorious contrasts. Served with cold beer and crisp cubes of pickled radish, it is both hot and cold, sharp and sweet, crunchy yet soft. Salty and spicy, it really is finger licking good.

How Korean fried chicken is made

Outside of Korean communities, when we talk about Korean fried chicken we generally mean the sticky sweet chilli version known as ‘yangnyeom’. We’ve tried dozens of the best recipes (each one of them different) and come up with what we feel is the definitive Korean fried chicken recipe.

The chicken

The best and most authentic way of cooking, as we saw earlier, is with a small chicken cut into pieces of no bigger than a few inches. This is not however the most accessible route so most people stick with wings. Skin is non-negotiable, and breast is pretty much a no-no unless it part of the whole bird approach that remains on the bone. Wings work well because they have the bone inside that helps them cook, and a complete covering of skin. If only wings had a slightly larger ratio of meat. You could also use chicken thigh with the skin intact but the bone removed.

The marinade

Simple is the way forward here. Subtle enhancement if you will. You don’t want the whole buttermilk/entire spice rack combo that southern fried chicken demands. Some recipes go for a dry seasoning, whilst others prefer a wet marinade. In Korea, they may brine the whole chicken for a couple of days first. The common denominator is ginger. Salt and pepper. Possibly a touch of rice wine, or a little vinegar.

Our favourite was a dry (ish) rub of fresh ginger, salt and pepper. However, rubbing the grated ginger from the chicken after the marinade time was up was a bit of a chore to say the least. We decided to use our organic ginger powder instead. You don’t get the sharp citrus bite of fresh ginger, yet it plays its part in the recipe well.

The crust

Then there’s the coating. Many recipes use a wet marinade followed by a dry coat of seasoned flour. In Korea they use a wet batter, which needs a very fine dry coat first in order to stick. This approach naturally lends itself to a dry seasoning. The sweet spot for the batter seems to be a mix of cornflour and plain wheat flour, with a touch of baking powder. Some like to add a touch of garlic powder, but we prefer to leave this out.

The fry

It goes without saying that deep frying requires several inches of oil in a large sturdy pan. A good quality wok is ideal. Groundnut oil is ideal for deep frying, or corn oil works well. Vegetable oil is fine.

The general consensus is an initial fry, then a final fry, with the latter at a slightly higher temperature. Feel free to ‘wing’ it but a thermometer or guage for accuracy is preferable. Temperatures varied widely, but a 15C difference between the two was standard. We think that 170C for the initial fry, increased to 185C for the second fry is ideal.

In between cook A and cook B, put the wings in a sieve or fryer basket and give them a vigorous shake. This gets rid of unwanted gnarly bits and gives that all important smooth glass-like shatter on the crust.

The sauce

Again, variation abounds. Chilli paste is the defining factor. Gochujang is a Korean fermented chilli paste but you can use an alternative. Ketchup featured heavily in many of the recipes, largely for its sharp sweet flavour profile that we feel can be best achieved in other ways. Soy sauce is a must. As are sugar and honey (brown sugar for its caramel, almost bitter, depth and honey for its nuances). Garlic also appears in every recipe we tried. The aim is a balance of sweet, sour, hot and savoury. A touch of sesame oil seems like an excellent addition.

For our sauce we use a few simple ingredients from our Asian organics range.

Recipe for Korean fried chicken

Serves 4

1 small chicken (as described) or 1kg of wings

1 tsp salt

1/2 tsp white pepper

1 tsp organic dried ginger

For the batter (and dredge)

1/2 cup cornflour

1 cup plain flour

1/2 tsp baking powder

1/2 tsp salt

3/4 cup water

For the sauce

1 tbsp soy sauce

2 tbsp honey

1 tbsp organic chilli paste

3 tbsp sweet chilli sauce

1 tbsp rice vinegar

1 tsp sesame oil

  1. Rub the chicken with the salt, pepper and ginger powder. Leave to marinade overnight.
  2. Mix the dry ingredients for the batter together and set aside half. Mix the remaining half with the water to make a thin batter.
  3. Pat the chicken dry and toss in the dry mix, shaking well to remove any excess.
  4. Add all of the sauce ingredients to a small pan and heat gently to combine.
  5. Heat the oil to 170C.
  6. Working in small batches, dip the chicken in the batter and fry for 6 mins. Remove from the oil, transfer to a wire sieve, and shake vigorously to smooth away any lumps and bumps. Place on a wire rack. Make sure the oil reaches 170C before moving on to the next batch.
  7. Once all of the chicken is fried, increase the temperature to 185C and fry again for 5 mins. Again, work in small batches so as not to overcrowd the pan.
  8. Place all of the chicken on a wire rack to cool slightly, brushing lightly with the sauce to serve.

Explore our range of Asian groceries, available to buy in bulk at wholesale prices…


This article was reproduced on this site with permission from operafoods.com.au the “Asian Sauces suppliers”.
See original article:- Our guide to Korean fried chicken (with recipe)


Simple Japanese kani salad recipe

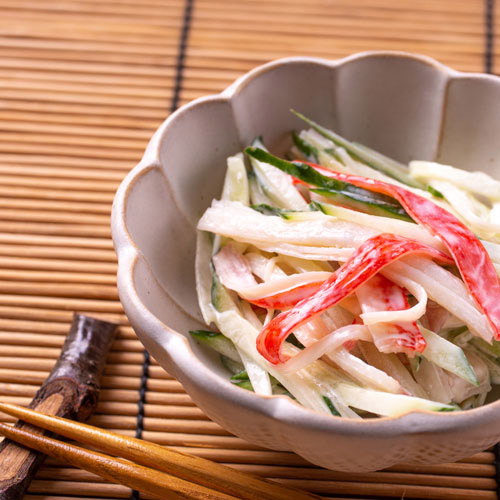
kani salad

The latest Japanese dish to dominate our Insta-feeds is kani salad.

Super quick and easy to make, it is the ideal starter or side dish. Sandwiched within a crisp baguette, in a sort of banh-mi fusion mash up stylie, it will transport you to lunchtime heaven.

What is kani salad?

Kani salad is a Japanese shredded crab salad. You can use fresh crab meat (kani in Japanese) but there are times when imitation crab sticks (kanikama) are way better than the real deal. Surimi may not have the flavour of fresh crab meat but its ability to shred into strips is a textural joy.

At its simplest, and we think possibly best, kani salad has just three ingredients. Shredded cucumber, shredded crabsticks, and Japanese style mayonnaise. But you can add other crisp shredded vegetables such as carrots, cabbage, or radish. Asian slaw anyone? Mango is not unheard of, and many restaurants like to add a little flourish with fish roe or even panko breadcrumbs.

Kani salad dressing

Japanese mayonnaise is more similar to homemade mayonnaise. It is made with egg yolks, mustard, rice vinegar and oil. Rice vinegar is ideal for making mayonnaise, with its subtle sweetness and lack of harsh acidity. If you can’t get Japanese mayo, use the best shop bought you can find.

A few drops of sriracha sauce added to the mayonnaise excites the palate with a little moreish heat. You can find out more about sriracha sauce in this article. Other subtle flavour additions such as lime juice and soy sauce enhance the flavour of the dish without overpowering its innate simplicity.

How to cut cucumber for kani salad

Cucumber is the star of the show in kani salad. Cool and refreshing, it is the perfect pairing for those shredded strips of surimi. Yet for such a simple ingredient, cucumber can be deceptively hard to work with. The high water content means it soon loses that crisp texture and it can leak out into a soggy mess. The skin is often bitter and indigestible. To combat this, peel the cucumber using a speed peeler. Then, slice the cucumber in half lengthwise and scoop out the centre bit with the seeds.

Chop into lengths the size of the crabsticks. Slice lengthwise into 3mm slices, then slice the slices into 3mm strips.

Here are a few tips for getting the best from your kani salad.

  1. Use cold cucumber and shred as close to serving as possible. It won’t sit well.
  2. Same with the crabsticks.
  3. Mix your dressing ahead of time so the flavours combine.
  4. Toss the ingredients and dress the salad immediately before serving.

Japanese kani salad recipe

Serves 2, as a side or sandwich filling

6 crabsticks, shredded

1/2 large cucumber, shredded

3 tablespoons mayonnaise

1 tbsp rice vinegar

A squeeze of fresh lime

1 tsp Japanese soy sauce

1 tsp sriracha

  1. Shred the ingredients and toss together.
  2. Combine the dressing ingredients.
  3. Mix together and serve immediately.

Try a kani crab salad sandwich

Try adding kani crab salad to a warm crisp baguette with shredded cabbage, carrot, and radish, plus fresh coriander, mint and parsley.

Explore our range of organic Asian groceries or head straight to our selection of Asian sauces.


This article was reproduced on this site with permission from operafoods.com.au the “Online Asian Wholesale Grocer”.
See original article:- Super Simple Japanese kani salad recipe

How to make teriyaki chicken like a Japanese restaurant

japanese teriyaki sauce

If you have ever had teriyaki chicken in a Japanese restaurant then you will know it is a far cry from the over-seasoned, over-thickened sauces of the supermarket and the all-you-can-eat international buffet.

Whilst there is nothing actually wrong with these commercial staples (there is a time and a place for everything, after all) the real deal teriyaki is a subtle surprise. Flavour and texture in perfect harmony; as most Japanese food is.


What is teriyaki?

Said to be a centuries old Japanese cooking technique, although there are many who would argue that fact, teriyaki is a grilled dish with a glossy sauce. In Japan it usually features fish, but the favoured version in the West is chicken. Closely followed by salmon. The root of the word is ‘-yaki’ meaning grilled, whilst the prefix ‘teri-‘ denotes the shine created by the sugar in the sauce.

What is teriyaki sauce?

Teriyaki sauce, known as ‘tare’ in Japanese, does not need to be thick to be glossy. Teriyaki chicken in a Japanese restaurant is more of a shimmering glaze that barely clings to the meat. It manages to be ethereally subtle whilst still packing a umami punch. Something which appears to be the secret to all Japanese food.

The ‘tare’ is not confined to teriyaki. As a marinade it forms the base flavours of Japanese fried chicken. Yakitori, the ubiquitous grilled skewer, also features the flavours found in teriyaki. ‘yaki’, as we have seen, means grilled. ‘tori’ means bird, usually chicken when used in a culinary sense. Yakitori is always chicken, always on skewers, and always grilled over an open flame. The skewers are grilled, dipped in sauce or brushed, and grilled some more. This is repeated until the chicken is cooked and coated in a gloriously caramelised coating. Same but different.

Teriyaki sauce is a simple blend of equal parts Japanese soy sauce and sake or mirin. Sugar is added in equal parts if using sake; much less is needed with the thicker, sweeter, mirin. Ginger, although not always used, adds another subtle layer of flavour.

How long do you marinate chicken in teriyaki sauce?

Actually you don’t. Both teriyaki and yakitori are cooked in sauce but not marinated. Marinating the chicken would affect the texture and therefore the way that it cooks. The entire crucial balance of the dish would be knocked out of whack.

How to make teriyaki chicken

Chicken thigh is the only way to make teriyaki chicken like a Japanese restaurant. If you want to use chicken breast then you are best making teriyaki chicken stir fry, which is another thing entirely. Why? Because chicken teriyaki is all about the skin. In fact it is all about soft soft meat, with crispy crispy skin. Which is a job that chicken thighs do really really well.

Despite ‘yaki’ meaning grilled, the best way to make teriyaki chicken is in a frying pan. One that has a lid, or at least something you can cover it with. Briefly. The aim is to render the fats out of the skin, making it really crisp, and then keep the meat soft with a shot of savoury steam. Makes sense, right?

Ideally, you want boneless thigh of a decent size, with the skin intact. It is easier that way, and they also tend to flatten it out a bit when sold this way. It may cost a little more. Or, you buy whole chicken thighs and get comfortable with prepping them. If you buy skinless boneless thighs then you clearly haven’t heard a word we have said. To prepare a chicken thigh you need to turn it over, skin side down, and carefully remove the bone by cutting the flesh around it. You can trim off the bit of excess skin. For best results, you should open the thigh out to make it flatter; a process known as butterflying. But as long as you can get the bone out, you are doing just fine.

Lay your now bone-free chicken thighs skin side up and poke several holes in them with a skewer.

Making the sauce

You could make up a teriyaki sauce with 1/4 cup Japanese soy sauce, 1/4 cup mirin, and a tablespoon sugar. Heat it together in a small saucepan so that the sugar dissolves and it reduces just a little. Grate 1 inch fresh ginger, and squeeze only the juice into the sauce. Or, you could just use our organic Japanese teriyaki sauce to make life much easier.

Cooking the chicken

Heat a frying pan over a medium-high heat and add the thighs, one at a time, skin side down. Pressing each one with your fingers for a minute or so helps to keep them flat and prevents bunching up. Don’t overcrowd the pan.

Once all the thighs are in the pan, cook for about 5 minutes. Turn the heat down to medium and cook for a few minutes more. The skin should be golden brown and crispy, with all the fat rendered into the pan. Pour this fat away, turn the thighs over, and add the sauce. It should cover the base of the pan, with the chicken meat immersed, but not the skin. Put the lid on, or cover the pan, and allow to steam through for one minute.

Remove the lid and let the sauce simmer for a few more minutes until it has reduced enough to cling softly to the chicken. Turn the thighs once, so the skin gets coated in sauce. The sauce should only be thick enough that it can cling. No thicker. Like thin gravy.

Set the chicken aside to rest for a few minutes and slice. Pour over the remaining sauce to serve.

Teriyaki chicken bowl

There are a few ways you could serve your teriyaki chicken. One is with a pile of crisp refreshing Japanese slaw, like this one. Or you could serve it with sticky rice and crisp green veg such as lightly steamed broccoli and asparagus spears. Or what about some Asian greens?

If you pile the rice in a bowl, top with the chicken, pour over the remaining sauce and add the vegetables, then what you have is teriyaki chicken don. That’s teriyaki chicken over rice in a bowl, and it is a really pleasing way to eat it. The sauce should be super thin; just enough to wet the rice a little. You could add a few pickles, like the ones in this post about Asian slaw and salads, or a simple flourish of spring onion. This is comfort food. Asian style. Good for your body as well as your soul.


We have plenty more organic Asian sauces to inspire you, and all of our South East Asian spices and condiments are available to buy in bulk.


This article was reproduced on this site only with permission from our parent co. operafoods.com.au the “Gourmet Online Wholesale Grocer”. See original article:- How to Make Teriyaki Chicken like a Japanese Restaurant